Making UserForms with MDUF requires a different approach from the conventional one based on the Designer. Admittedly, the learning curve is steep. But the rewards are numerous. Maintenance is significantly less costly, once you have a UserForm designed. Whether you’re already committed, or just curious, there are some basic steps you need to take.
- Installing the MDUF add-in
- Installing auxiliary files
- Enabling trust access to the VBA project object model
- Testing the installation
- Making UserForms
Installing the MDUF add-in
To begin, you must install the MDUF add-in. The add-in is an Excel add-in (as distinguished from an Office add-in). It’s in a file called FormMaker.xlam. The file FormMaker.xlam can reside anywhere you keep files. But a standard place to keep add-ins is this:
/Users/<username>/Library/Group Containers/UBF8T346G9/User Content.localized/Add-Ins.localized/In that path, <username> stands for your MacOS username.
After you’ve copied the MDUF add-in to the place you prefer, you must tell Excel about it. To tell Excel about the add-in, there are two choices—a menu command and a ribbon command. The menu command is available “out of the box,” in the sense that you have access to it without any customization of Excel. Invoke the Excel menu command Tools>Excel Add-Ins… from the Excel Tools menu. Once the Add-ins dialog is open, verify that the MDUF add-in is present in the list of add-ins. If not, use the Browse… button to navigate to the add-in. Select the add-in and click Open. Then click the checkbox next to the name “Formmaker” and click OK.
To enable the add-in using the ribbon command, the Developer tab of the ribbon must be present in the ribbon. It isn’t present by default in Excel. To add the Developer tab, choose the Excel menu command Excel>Preferences… (see Appendix: Notation for an explanation of our notation), or press Command+Comma to expose the Excel Preferences dialog. In the “Authoring” strip, click “Ribbon & Toolbar” to expose the “Ribbon & Toolbar” dialog. Click “Ribbon” at the top to flip to the Ribbon page. Under “Customize the Ribbon:” choose Main Tabs from the dropdown. In the “Main Tabs” ListBox, make sure that the checkbox next to “Developer” is checked. Click “Save”. After you show the tab, the Developer tab stays visible whenever you use Excel, unless you clear the checkbox or reinstall Excel. With the Developer tab of the ribbon now visible, you can invoke the Add-ins dialog with the Excel ribbon command Developer>Add-ins>Excel Add-ins… . The list of available add-ins should now include the FormMaker add-in. It appears as “Formmaker”. Make sure that the checkbox next to its name is checked. Click OK.
Installing auxiliary files
MDUF uses several other files in addition to the add-in. They include one AppleScript and several Excel workbooks. This section assumes that you have already installed and enabled the MDUF add-in. The procedures in this section will operate as described only if the MDUF add-in is installed and enabled.
MDUF-init.xlsm
Before using MDUF, install the workbook MDUF-Init.xlsm in the folder ~/Library/Application Support/MDUF/ . This is the initialization file for MDUF. It contains several named cells that tell MDUF where to look for other files. Its full pathname is ~/Library/Application Support/MDUF/MDUF-Init.xlsm. The folder ~/Library/Application Support/ exists on all Macs. To install MDUF, you must create the folder MDUF within it and then drag MDUF-Init.xlsm into that folder. (see Appendix 1: Notation for an explanation of the notation we use for file pathnames)
The most important of the named cells in the MDUF-Init.xlsm workbook (for now) is the cell named MDUFProjects. It contains the pathname of the folder that holds all your MDUF project files. This is a convenience. MDUF places no constraints on where you store your projects. But if you store your project files in the MDUFProjects folder, or its subfolders, then when you invoke the MDUF command to load a project workbook, MDUF presents a file open dialog with this path as the default, which simplifies navigation.
To set the MDUFProjects folder, create it first. It can have any name you like. Then load MDUF-Init.xlsm into Excel. On the worksheet Settings, click the button captioned “Set Project Path”. MDUF then presents a Choose Folder mDialogBox that enables you to navigate to your MDUFProjects folder. When you click “Choose Folder” MDUF inserts the path of the chosen folder into the cell named MDUFProjects.
This convenience is optional. If the MDUFProjects cell is empty, MDUF assumes that MDUF projects are in your home folder. If the cell named UseMDUFProjects contains FALSE, then the cell MDUFProjects is ignored. If MDUF doesn’t find MDUF-Init.xlsm in the MDUF folder, it notifies you of its absence.
- Project.xlsm
- This workbook is a blank MDUF project workbook. You use it to make copies for creating new projects containing UserForms, or for capturing legacy UserForms. Store it in ~/Library/Application Support/MDUF/ (see Appendix: Notation for an explanation of the notation we use for file pathnames)
- RunMDUF.scpt
- This AppleScript is used internally in MDUF. Store it in the location ~/Library/Application Scripts/com.microsoft.excel. If com.microsoft.excel does not exist, create it.
Enabling trust access to the VBA project object model
One more thing. The MDUF add-in needs access to the VBA Project Object Model to add UserForms to your workbooks. It needs privileges before it can do this, and those privileges are not set by default, as a security measure. You need to communicate this fact to Excel in Excel’s preferences.

If you’re developing UserForms, you probably have macro security set to “Disable all macros with notification.” That’s the setting you want for MDUF. To verify this, Open the Excel Preferences dialog (Command+Comma) and flip to the Security panel. In the section “Macro Security,” be sure that “Disable all macros with notification” is ticked. And in the section “Developer Macro Settings”, check the box labeled “Trust access to the VBA project object model”. Close the dialog. Done. This requirement might sound a bit scary, but it isn’t unusual. It’s common for Excel VBA add-ins to require this level of trust. Still, when you find that you no longer have ongoing need for MDUF or other add-ins that require this level of trust, it’s best to uncheck this option.
Testing the installation
To “smoke test” the installation, look for the MDUF tab in Excel’s ribbon. It should be located to the right of the Insert tab. If you can’t find the MDUF tab of the ribbon, either the installation didn’t succeed, or your version of Excel doesn’t support ribbon customization. Find someone to help you with that. One possibility is that add-ins are banned on your computer.
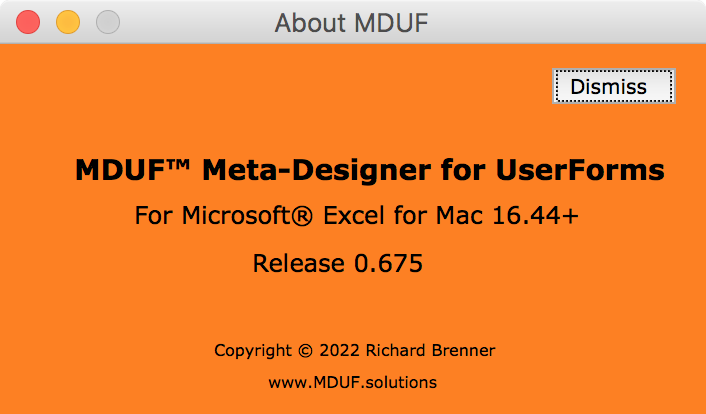
If you found the MDUF tab of the ribbon, select it and click the tool MDUF>About MDUF… at the extreme right. (On small screens, you might need to scroll the ribbon horizontally to see the MDUF section of the MDUF ribbon tab) A UserForm should appear displaying general information about this release of MDUF (0.675). Dismiss the UserForm.
Making UserForms
The last file you need before you can make UserForms is an MDUF Project workbook. You should have received it in template format. Its name is Project.xltm. When you want to make UserForms, open this file and save it under a new name, as a macro-enabled workbook (not as a template).